How to Adjust Coilovers – Height, Dampening, Spring Preload, Camber and More
One of the benefits of coilovers is that they come with a lot of adjustment settings you can change to really get your car set up the way you want it to. However, sometimes all these different adjustments can get a bit overwhelming especially if you are not a suspension expert and you just want to lower your car and improve the handling.
In this post I’m going to cover the different adjustments you can make with coilovers and how to do them correctly.
Table of Contents
How to Adjust Coilover Ride Height
First and foremost is ride height. This is the main reason 90% of people buy coilovers, to be able to set the ride height exactly as they want it.
The most important thing to know about setting coilover ride height is that there are two types of coilover:
-
Fully Threaded Coilovers
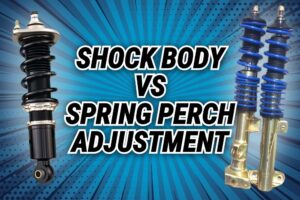
Fully threaded coilovers allow you to adjust the ride height by the shock body (BC Racing, TEIN, Megan Racing etc). They have the spring perches but also have a third locking collar at the bottom:
 That’s how you can tell you have fully threaded coilovers.
 -
Partially Threaded Coilovers
Partially threaded coilovers adjust the ride height by winding the spring perches down (KW are an example of this). They look like this:
If you have the fully threaded coilovers (#1), you adjust the ride height by loosening the lower adjustment collar at the base of the shock body, wind the whole shock body up and down, and then tighten the collar. DO NOT ADJUST THE HEIGHT BY THE SPRING PERCHES. This adjusts the spring pre-load and will change the way the car rides – we will address spring pre-load in the next section.
If you have the partially threaded coilovers (#2), then the only option you have is to adjust the height by the spring perches, so loosen the adjustment collars, wind the springs down, and then tighten the collars up against each other.
A Tip When Adjusting Coilover Ride Height
Use the end of the threads or another fixed point on the coilover to measure the distance between it and the spring perch. This will ensure you can set the ride height exactly the same on both sides.
Measuring height on fully threaded coilovers:

Measuring height on partially threaded coilovers:
Corner Balancing the Car
If you have the fully threaded type coilovers, the ideal way to set the ride height is actually to get the car corner balanced. Corner balancing is when the car is put on scales which measure the load on each individual wheel, and the coilovers are adjusted so that the load is even across all four wheels.
This will ensure that the car is fully balanced and will handle and ride the best. However, for most people just looking to lower their daily driver, this isn’t necessary.
How to Adjust Coilover Spring Preload
Spring preload is how much pressure (or “load”) is being applied to the spring without the weight of the car. In the case of coilovers, this means how much the spring perch is pushing up against the spring.
Only coilovers that are fully threaded give you the ability to adjust spring preload. On partially threaded coilovers you can’t specifically set the spring preload, so if you have partially threaded coilovers you don’t need to concern yourself with this at all.
Spring preload is actually a rather complex and much debated topic, but it’s not something that the average person needs to worry too much about. Just be aware that it will affect how the coilovers ride, and it will make sure that your springs are always captive (held in place), so you need to set it right.
Usually on the coilover instructions the manufacturer will say how much spring preload you should set on your coilovers. Most coilovers also come preloaded from factory, so if you’ve bought them new you shouldn’t have to worry about it.
However, if you do need to set the preload, and if the instructions don’t give you the preload settings or you don’t have the instructions (say you bought the coilovers second hand), then a good baseline to start with is to adjust the perches to the point just beyond where you can turn the spring by hand. Usually this is about 5mm.
To begin, it’s good practice to measure the spring height while it’s loose, so you know exactly how much preload you put on it and can do the same on the other side. You can also remove the base of the coilover and measure to the bottom of the threaded shock body for an even more accurate measurement.
To set the spring preload, wind the top spring perch up against the spring by hand as much as you can.
Next, wind the bottom locking perch up to the spring perch so that it’s touching.
Now, wind the top perch up against the spring until there is 5mm gap between the top perch and the bottom perch. You can use the width of the adjustment wrench as a guide.
Last, wind the locking perch up against the spring perch and tighten them against each other to lock it in.
Now measure the length of the spring, it should be 5mm (or however much preload you set) shorter than it was at the beginning. You can also measure against the bottom of the shock body if you did it this way.
Do the same thing for the other side.
Adjusting Preload On Separate Shock And Spring Setups (Divorced Rear)
If you have a separate shock and spring rear, you’ll need to set the spring preload by installing the spring and sleeve, as well mounting the top of the shock. Loosen the locking collar on the shock. Don’t bolt the bottom of the shock in yet.
Measure the height of the spring while it’s loose, and then jack up the lower arm to apply preload to the spring. Generally speaking you’ll want 5-10mm preload on the rear springs (refer to manufacturer’s instructions for exact setting).
Once you’ve jacked the lower arm up so that the spring is now 5-10mm shorter than when loose, wind the shock mount up or down so that it can be bolted to its lower mount. Put the bolt in, and then tighten the locking collar on the shock.
The spring preload is now set. Do up the rest of the bolts and complete the installation.
How to Adjust Coilover Dampening Stiffness
Not every coilover has the ability to adjust dampening stiffness. Most coilovers that do have one adjustment for both rebound and compression, but higher end kits mostly designed for track use will allow you to adjust rebound and compression individually. There are also kits that allow 3 and 4-way adjustment, but that is beyond the scope of this post.
To adjust dampening stiffness on most coilovers, you need to turn the knob at the top of the shock shaft. If there is no knob, you’ll either need the tool or an Allen key to insert in the hole to adjust it.
Most rears will also have this at the top, however some will have a wheel towards the bottom of the shock if access to the top is difficult.
If your shocks have individual rebound and compression adjustment, then the rebound will be done as above, and the compression adjustment will be done at the bottom of the shock – there is usually a knob or a wheel to allow you to adjust it.
Practically all coilovers use a “click” system, where by adjustments are done by clicks so you can keep track of how much you have adjusted each shock.
NOTE: Shocks on the same axle (either both fronts or both rears) need to be adjusted to the same stiffness. If you adjust the shocks differently, the car is going to handle unpredictably and the ride will not be good.
How to Adjust Camber on Coilovers
Many coilovers come with adjustable camber strut mounts, usually on the front, if the vehicle’s suspension design allows for it. However, there is also another way to adjust camber on many vehicles – at the lower mount.
Adjusting Camber By the Camber Adjustable Strut Mount
If your car and your coilovers allow for camber adjustable strut mounts, then you will be able to adjust the camber there. Camber adjustable strut mounts look like this:
To adjust the camber, you need to jack the car up and loosen the two or four Allen head screws, and then you will be able to slide the top of the coilover within the slot to set the camber. The strut mount should have markings on it so that you can set it the same on both sides.
Adjusting Camber By Bottom Mount
If your car has a lower shock mount that looks like this:
Then you are most likely able to adjust the camber at least a little bit. The holes in the shock for the bolts are sometimes slotted, giving you room from camber adjustment. If not, you can buy what are known as “camber bolts” (eccentric bolts) which will allow you to set the camber from this mount.
So, if your coilovers didn’t come with camber adjustable strut mounts, this is the other way you can do the camber adjustment.
How to Adjust Coilovers Without the Spanner Wrench Tool
If you don’t have the adjustment spanner tools for tightening and loosening your adjustment collars, don’t worry.
You can use a flat head screw driver and a hammer to loosen and tighten the collars.
Simply take the flat head screw driver and place it in one of the grooves on the collar (make sure you are facing the correct way you want to spin the collar) and tap on the handle of the screw driver with the hammer. Unless the collars are seized, you shouldn’t need to use too much force.
Can You Adjust Coilovers While They Are On the Car?
Yes you can adjust coilovers while they are on the car. To adjust the ride height, you will most likely need to jack the car up and take the wheels off, but the coilovers do not have to be removed.
- BC Racing BR Series VS Tein Flex Z Coilovers - April 15, 2024
- The Pros and Cons of Shock Body Vs Spring Perch Coilover Height Adjustment - April 13, 2024
- Monotube Vs Twin Tube Shocks: The Ultimate Guide - April 11, 2024


