The Ultimate Guide to Underglow Kits: Everything You’ll Ever Need to Know
If you want to install an underglow kit on your car and actually make it look good, there are some things you need to know.
Far too many people install underglow but don’t do a very good job, so you end up seeing the LEDs, which are not even straight, and it just looks rubbish.
Along with that, there’s also a wide range of different kits with different LED types which will give you various features from lighting effects to multiple color arrangements such as color chasing and so on.
In this post I will cover everything I learned about underglow after messing with it for years.
Firstly, What Is Underglow?
Underglow, also referred to as Neons, is technically any light that it placed under a vehicle which points to the ground and creates a glowing effect under the car – thus the name “Underglow”.
Originally, underglow kits were made of real neon tubes, like the old Street Glow series neons. Over the years, as technology progressed, different options became available from single color, rigid LED tubes to fully flexible and very thin LED strips which could display millions of colors and be controlled by an app.
We will cover all the different types of underglow here and what their pros and cons are.
The Different Types of Underglow
Neon Underglow
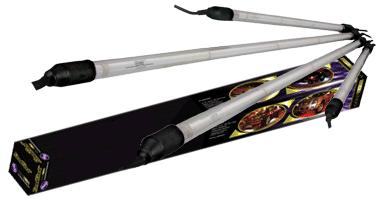
As mentioned a little bit earlier, neons were the original underglow kit. They were literal neon tubes which were mounted under the car to produce the underglow effect.
Due to the nature of neon, they only came in one color, and could do any effects except for pulsing.
They were not flexible, which made mounting them difficult, and they usually came in fixed sized. This means that it would be impossible to make the light the exact length or width to match your car. They were also very fragile and would break often, meaning buying replacement tubes (if available) or a whole new kit was very common.
However, in my opinion, neons produce the best lighting projection of all underglow kits, given their very bright light, rich color and 360 degree light output which spreads their light further and wider than basically any other underglow kit.
You can still buy true neon underglow kits, for example Street Glow still produces their Gold Series kit, but they are getting hard to find.
LED Underglow
The other option you have if you want an underglow kit is LED. Now, there are many different versions of LED underglow kit available, and they are not all equal, so we’ll go through them one by one.
Single & 7 Color LED Tubes
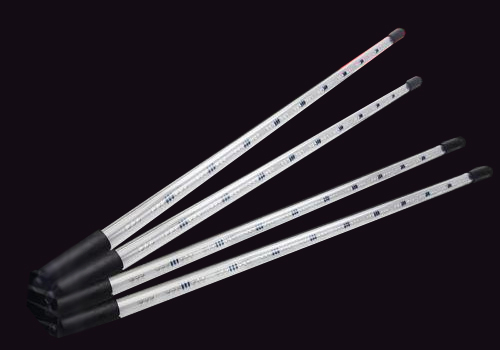
These were the first LED kits when underglow started transitioning from neon to LED. They came in rigid plexiglass tubes about an inch thick, had a row of LEDs and were usually single color. Some more expensive kits came with the option of 7 preset colors.
These were a bit cheaper than neon kits but offered little other positives, as they were also fixed in size, rigid, hard to hide and install and you couldn’t get replacement tubes for most of them if you ever damaged one. Perhaps they were a bit tougher than neon tubes.
These kits are almost impossible to find now, since they were a transitional product that didn’t really improve on the last product (neons), but also didn’t have the “retro cool” aspect, and got replaced by flexible LED strips which are better in almost every way.
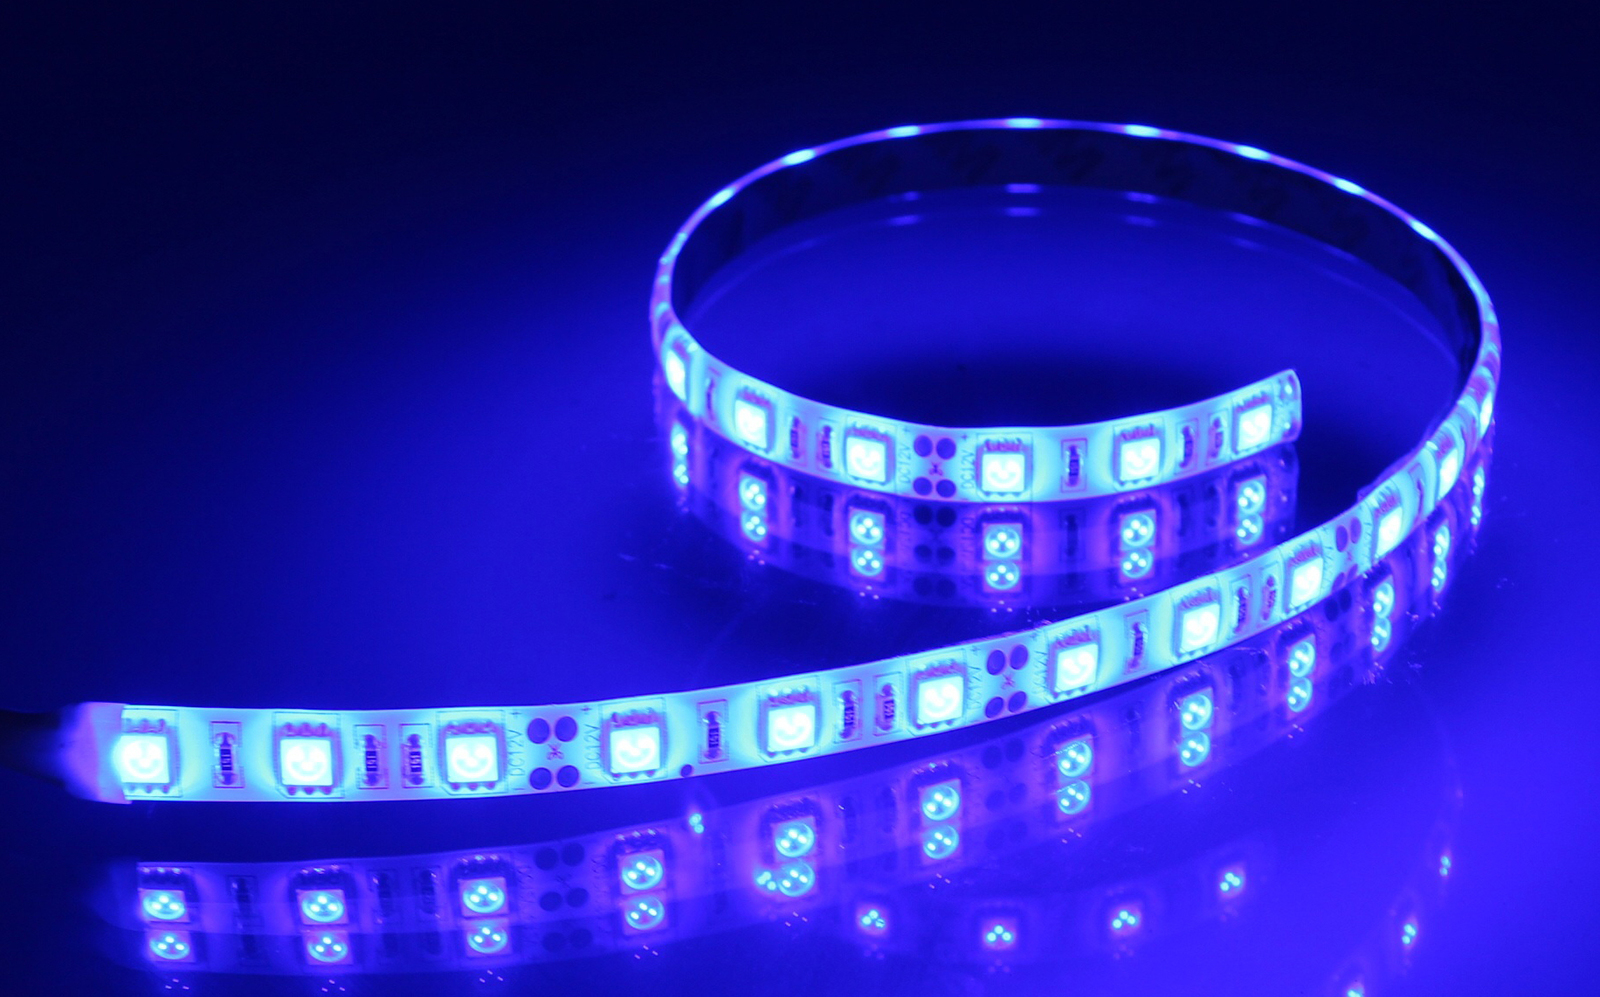
Flexible LED Strips
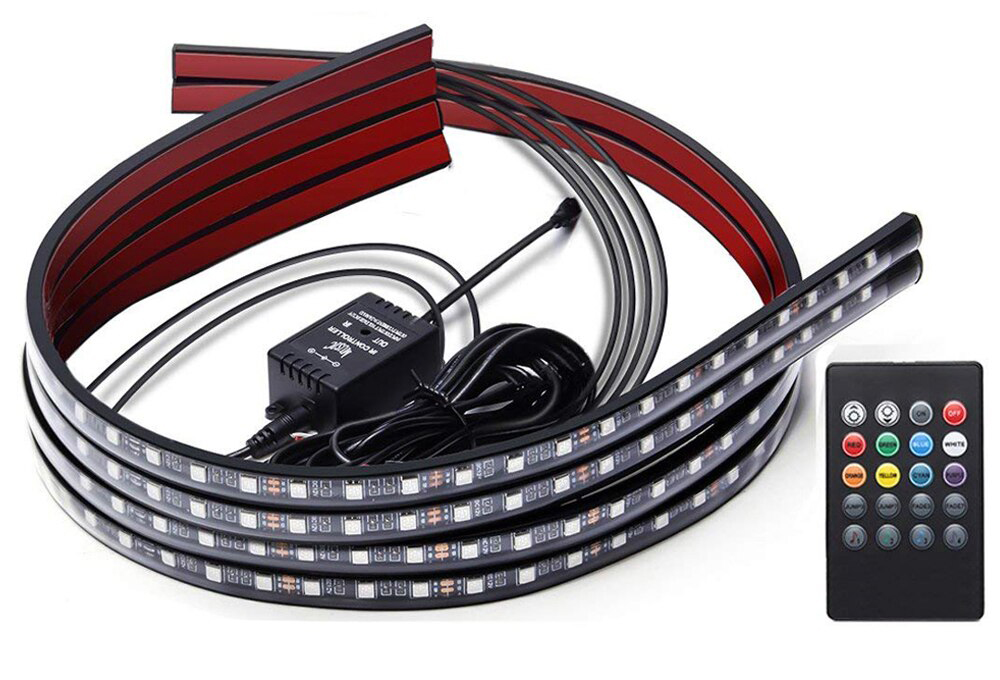
Flexible LED strips came out quite a while ago now and quickly began to be used for underglow kits due to their very thin size, flexibility, customizability and easy of installation.
Flexible LED strips made it very easy to install underglow without even buying an actual underglow kit – if you got waterproof LED strips and hooked them up to power and ground, you had underglow.
This cut the price down from a few hundred dollars for an underglow kit to less than $50, and made it super easy to get underglow for any car. You could buy exactly the length you needed for your particular car, in any color you wanted, and it wouldn’t be hard to replace a strip if something happened. Perhaps this was what triggered their recent re-emergence in popularity.
Now, within flexible LED strips there are a ton of options which are important to know if you want to get exactly what you are looking for.
Single Color LED Strips
Single color LED strips are the cheapest and simplest to install. They only require power and ground, no control module, and you can buy them by the meter to get the exact length you need.
Most will come as SMD5050 LEDs, you can find other variations but they won’t make a massive different.
Where the difference will come from is whether they are 30 LEDs per meter or 60 LEDs per meter. This literally means what it says, that there are either 30 or 60 LEDs per meter of strip. The 60 LED strips are twice as bright as the 30 LED strips, so if you want super bright underglow make sure to get those.
RGB LED Underglow Kits
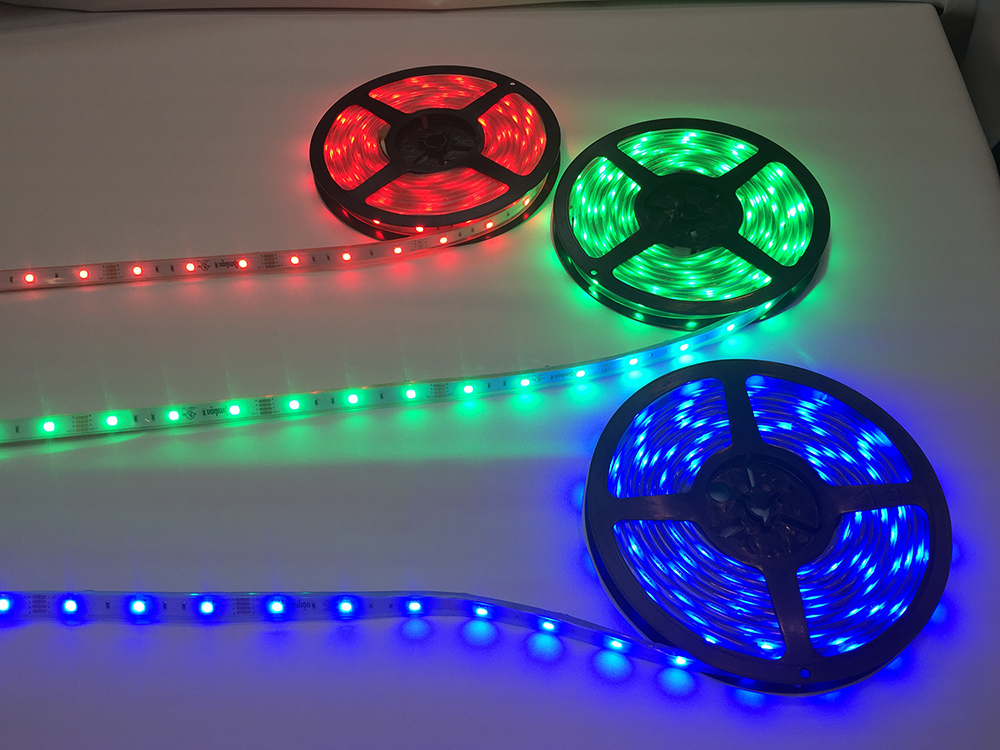
RGB LED underglow kits come with LED strips that are RGB capable, meaning they can display any color you want. Depending on the controller that comes with the kit, you can either select from their preset colors, or fine tune to the exact shade you want.
A lot of these kits come with an app controller, where you download an app onto your phone and get access to a color wheels and lighting effects you can play with such as pulsing or flashing.
However, be aware that with these kits you can only display one color at a time – so while you can fade through all the colors, you can’t set blue on the front blending to red on the rear, for example.
You can either buy these kits as a complete underglow kit or you can buy individual RGB LED strips and a controller that suits your needs and put it all together.
Addressable LED Underglow Kits (Also Known As Color Chasing or Flowing)
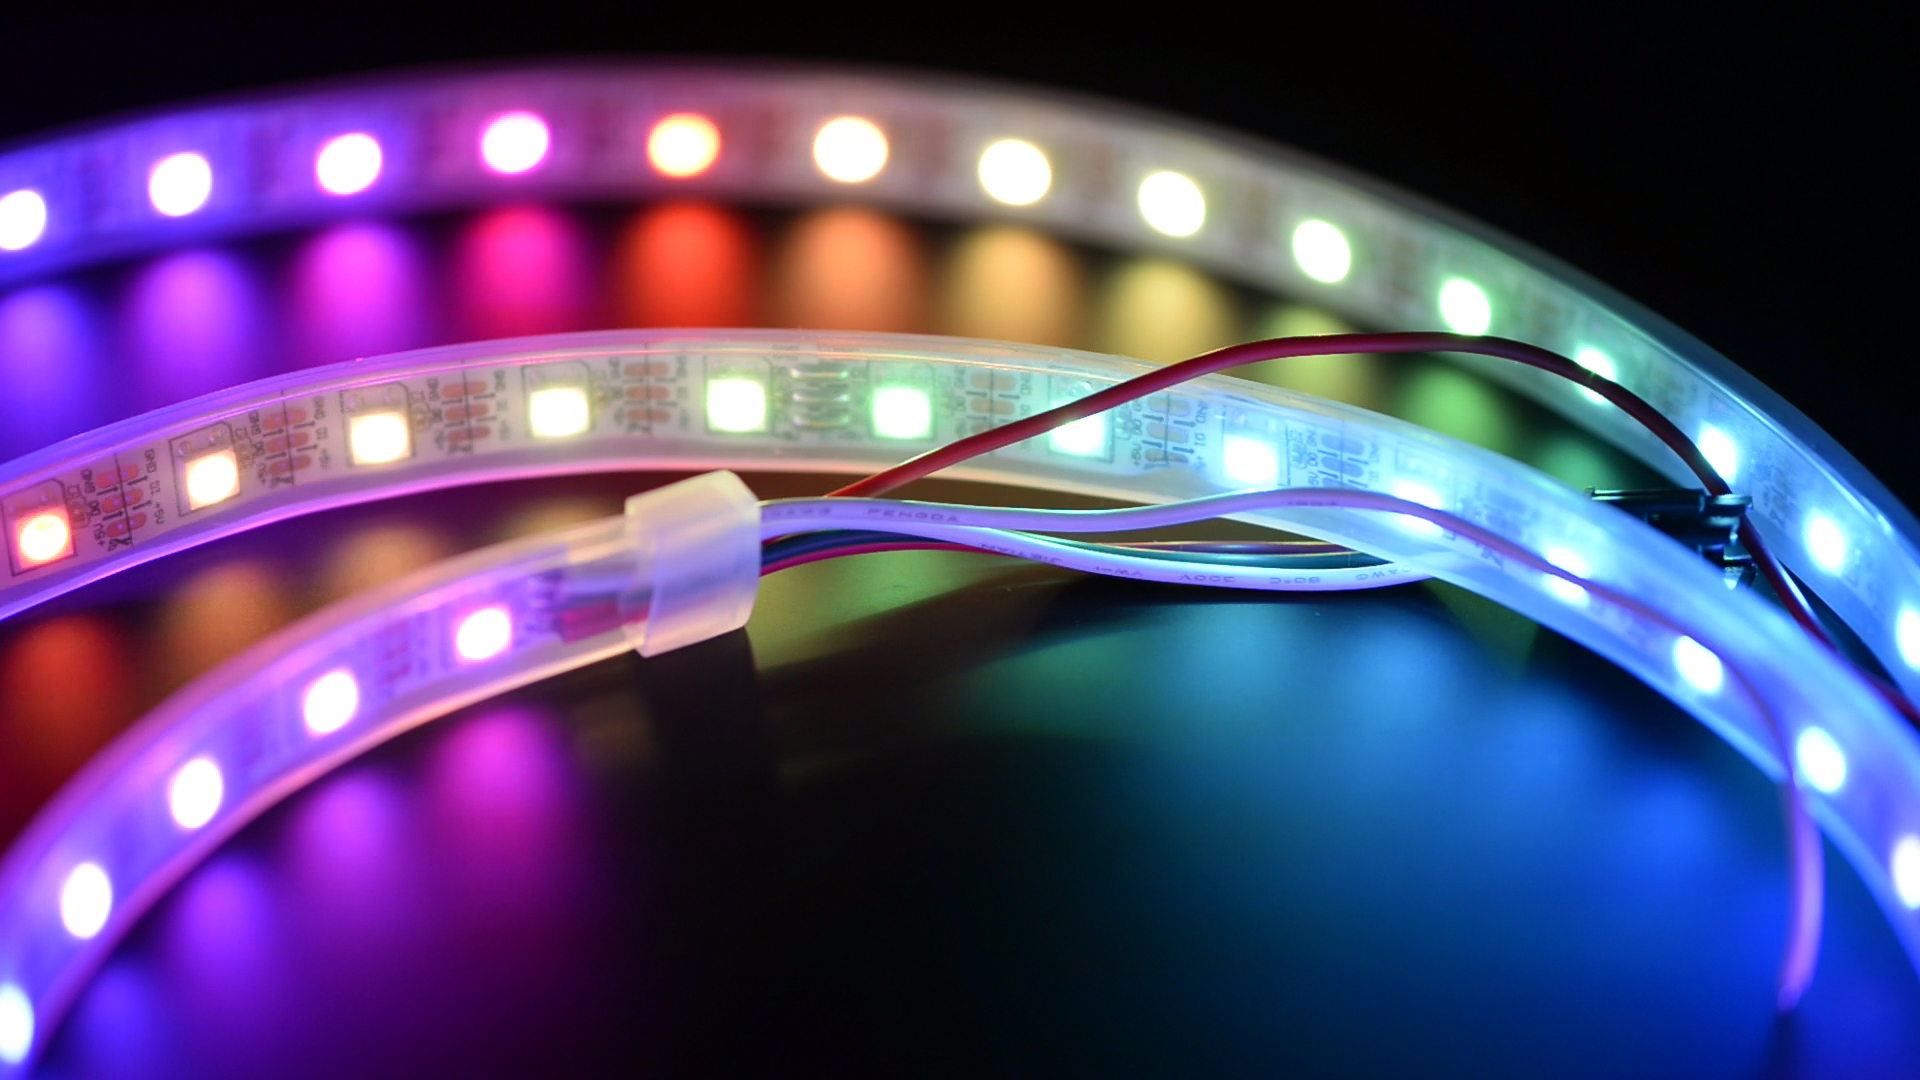
Addressable LED Underglow Kits, more commonly known as Color Chasing or Flowing, give you the option to do literally whatever you want.
Each LED gets a signal to display what you tell it, so in theory you could display a different color on every single LED in the whole system.
This allows you to set all kinds of color combinations and do all kinds of lighting effects, basically without limit. The only limitation is what the controller you use will allow you to do.
Unlike the other LED kits which can be wired in parallel, these strips must be wired in a series so that the signal can continue down the strip from the front to the rear of the car (or vice versa). We will talk about this a little later in the installation section.
These are also available in 30 LED, 60 LED and even 144 LED per meter, though the 144 LED versions are probably overkill for an underglow kit and would require quite a lot of power to run. Generally speaking you should go with the 60 LED version which is more than bright enough.
There’s also a ton of different versions of LEDs and chips which control them (most notable being 3 LED per chip vs 1 LED per chip – where the chip determines what that group of LEDs will display) but honestly they won’t make a big difference in terms of how your underglow looks so don’t worry too much about that unless you really want to get into it.
Some more advanced addressable LED strips have an additional signal wire just in case an LED fails or there is a problem with the first wire, the rest of the LED strip will continue to work. This could be useful to know if you are putting together your own kit.
You can either buy these as complete kits, or you can purchase the strips and controller separate, but be aware that means you’ll have to make the wiring harness to go between all the strips.
IMPORTANT NOTE WHEN BUYING ADDRESSABLE (COLOR CHASING) LED STRIPS
You will find two types of kit when looking at addressable underglow kits, those with four LED strips and those with six LED strips. You want to buy the ones with six. Why?
The way the addressable LED strips work, they send a signal to the start of the strip, which gets carried to the end of it. Which means, if you want your underglow to display symmetrical, the signal needs to begin from the center of the strip at the front or rear.
Most four strip kits start from the corner, so you will not be able to display a symmetrical pattern with these kits. Here’s a diagram to show you what I mean:
4 strip addressable LED kit:
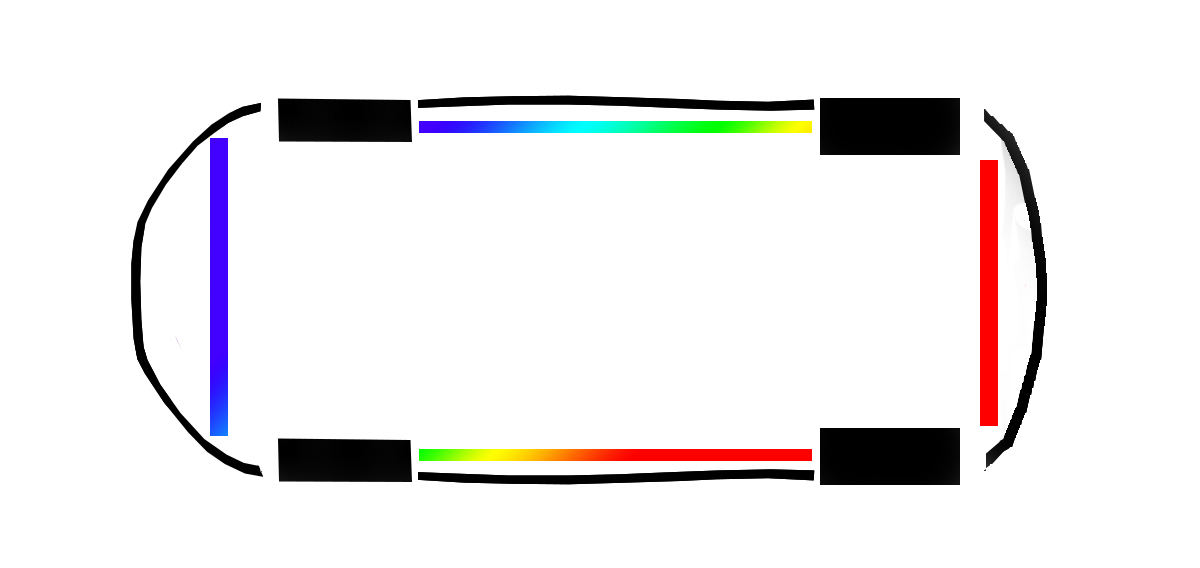
See how it’s not symmetrical?
Whereas the 6 strip color chasing LED kit will be symmetrical:
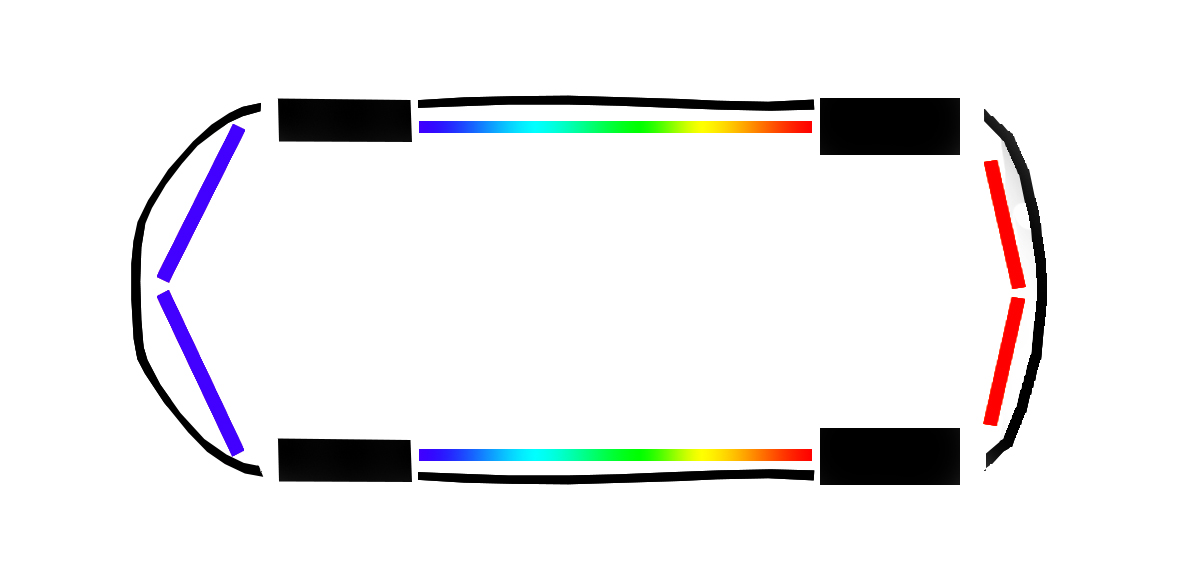
You can buy a 6 strip underglow kit here.
LED Underglow Kit Controllers
There are a range of controllers that can be used to control the underglow kit, whether it’s RGB or addressable.
Personally I find that most controllers that come in the complete underglow kits don’t have everything I want, so I usually use another controller like the 44 key RGB controller or the SP108e (Wifi with phone app) controller for addressable LEDs.
You’ll find a range of controllers online (on Ebay or Aliexpress) which either come with a remote, or with Bluetooth or Wifi which you control through an app on your phone.
If you want to change out the controller that came with your underglow kit, you’ll need to cut the wires from the old controller and usually solder a plug on that matches the one on the controller in order to connect them. So keep that in mind.
If you are building your own kit, you’ll need to get a controller and wire it up to your LED strips.
Installing Your Underglow Kit
How you install the underglow kit is going to make the difference in how good the kit looks on the car.
Where you install the tubes or LED strips, how you mount them will make the difference between a professional looking installation where you can only see the glow vs one where you can see the LEDs and they look like they are falling off because they are not straight.
Mounting Your Underglow Kit
It can actually be quite difficult to find a good mounting position on some cars where the LED strips will fit, you won’t see them from low angles, but where they will also project an even glow on the ground that doesn’t get cut off on the edges. And every car is going to be different.
Front and Rear
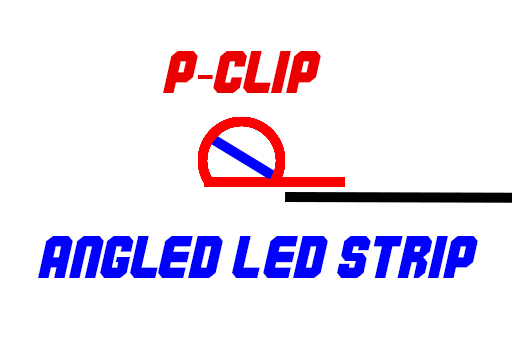
I’ve had the most success with the front and rear bumpers by using P-clips like the ones pictured below, and screwing them to the inside of the bumper so that the LED strip is above the line of sight, even from low angles. If they didn’t come in your kit, you can buy these P-clips on Ebay or Aliexpress in a wide range of sizes to suit your LED strip width.
The P-clips:
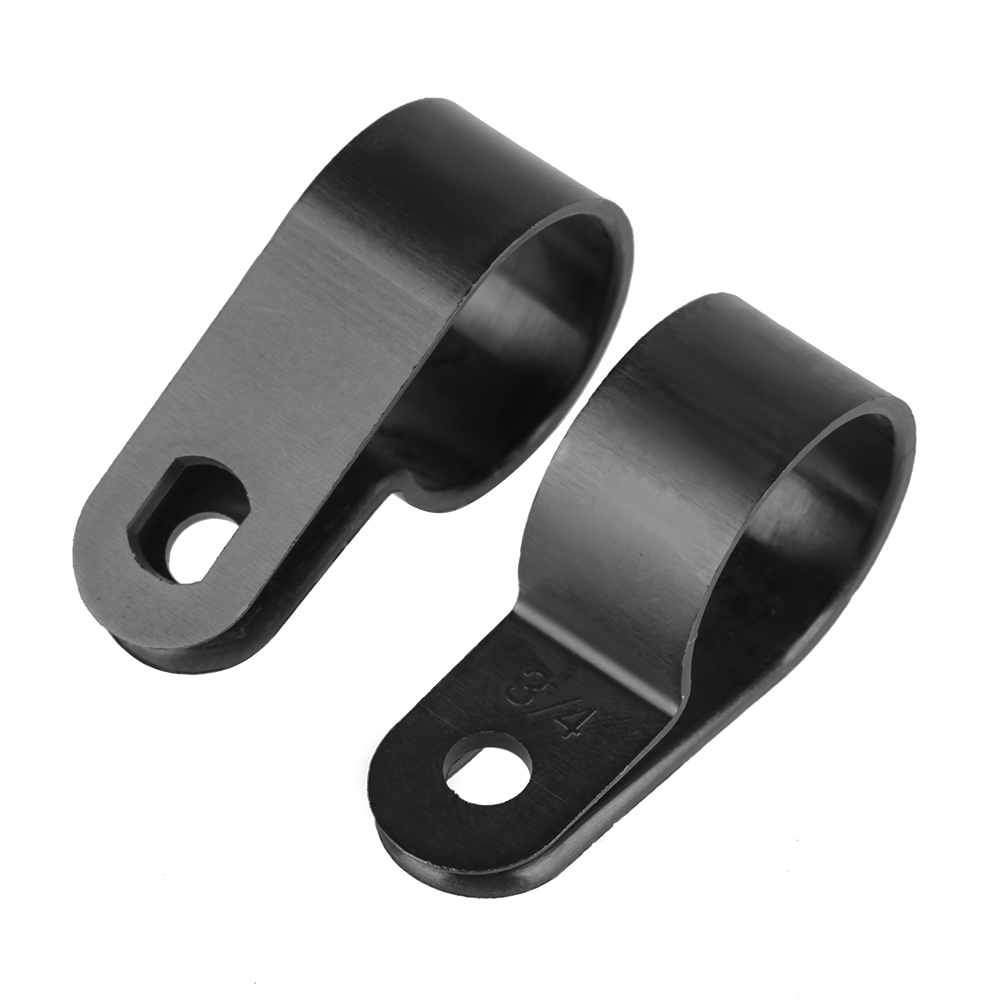
Diagram of how to mount the P-clips:
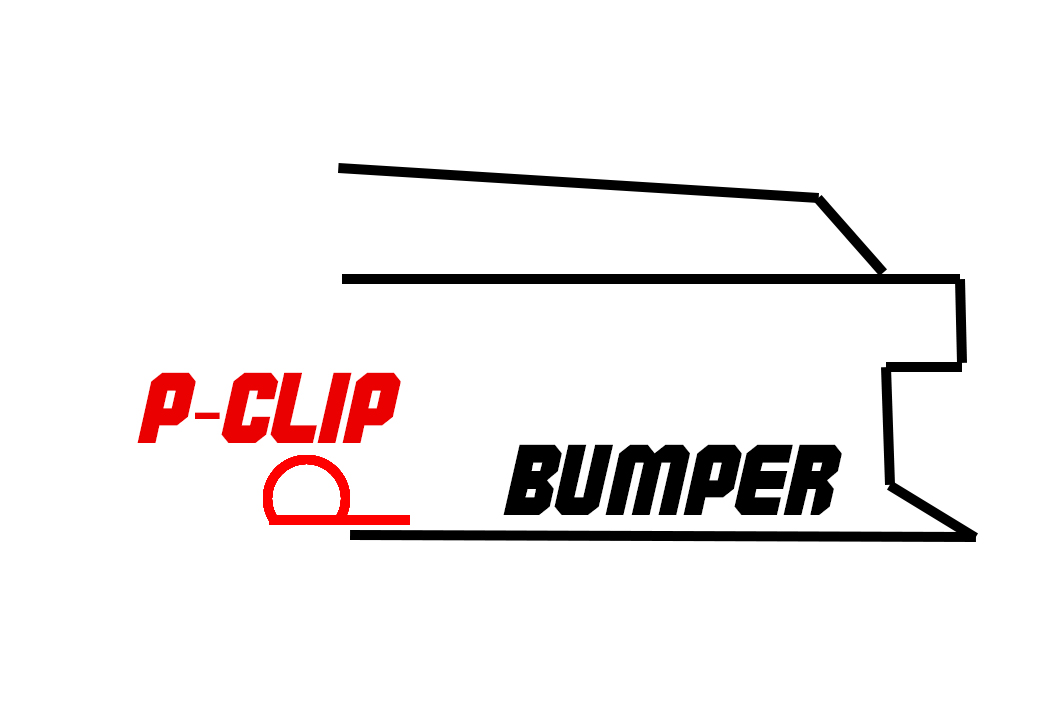
Make sure that the P-clip is turned upwards rather than downwards, as that’s going to help hide the strip (this is why you don’t mount it to the bottom of the bumper, but rather the inside). You also want to turn the LED strip inside the P-clip at an angle so that it’s even harder to see:
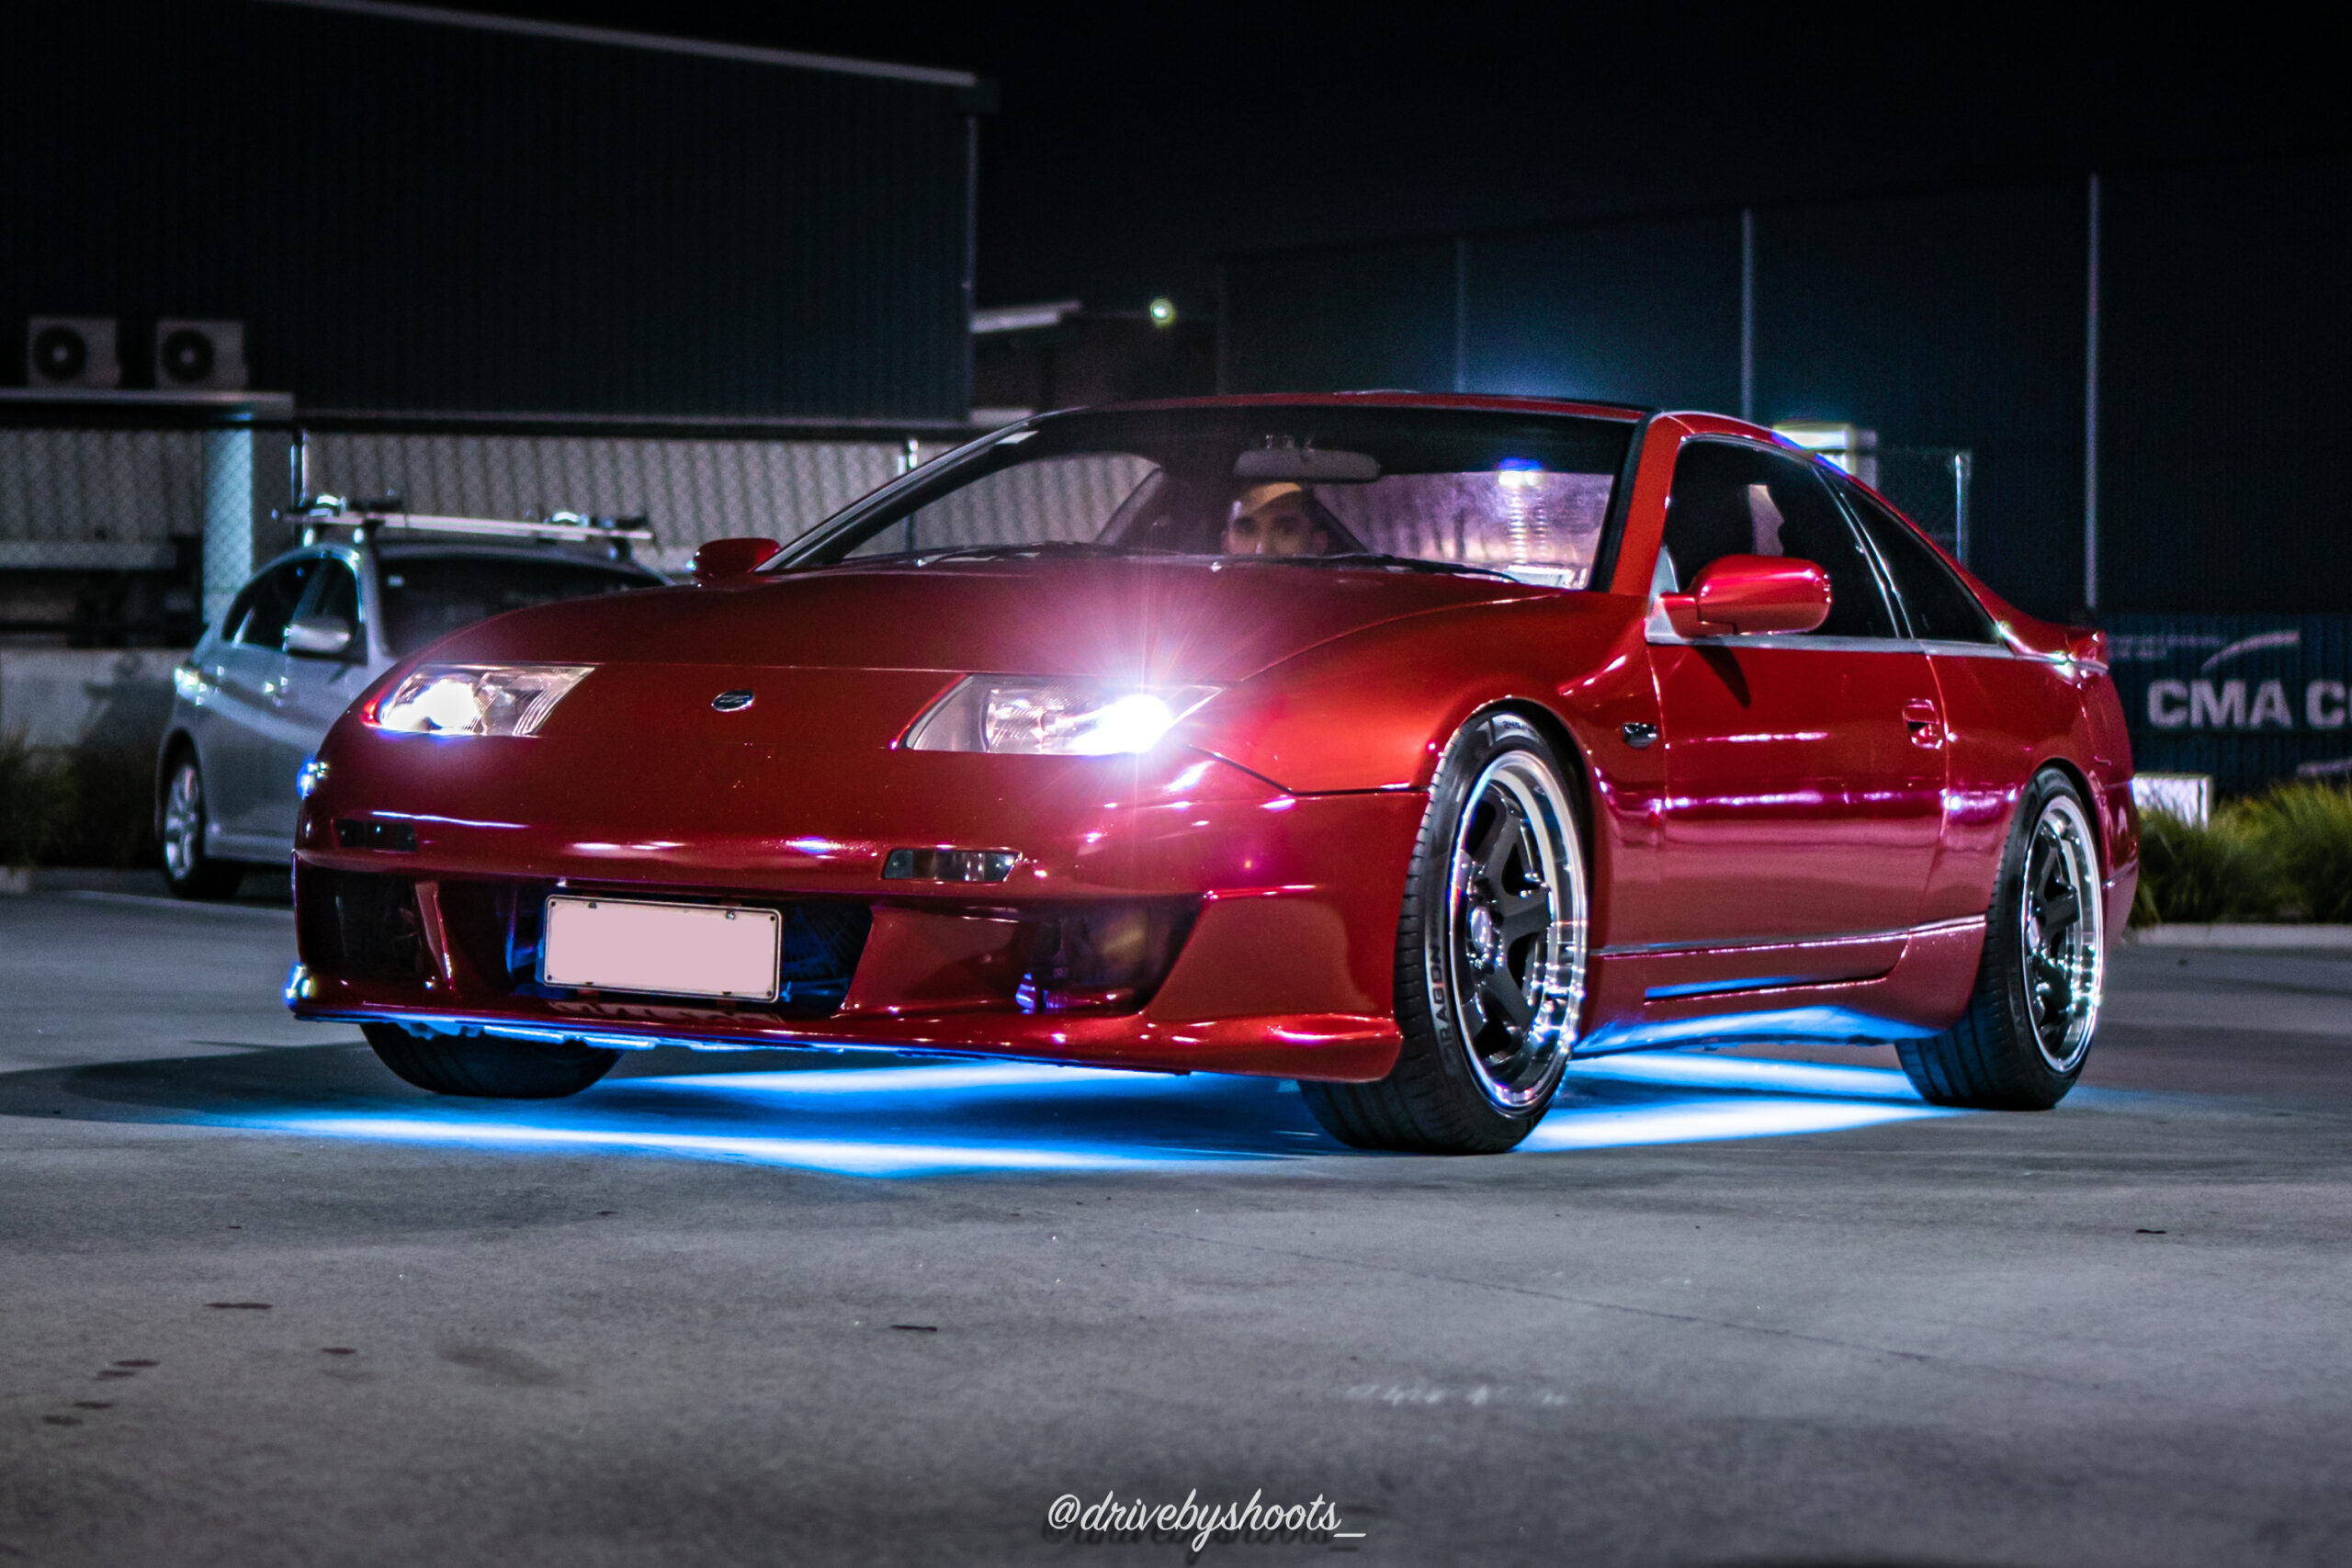
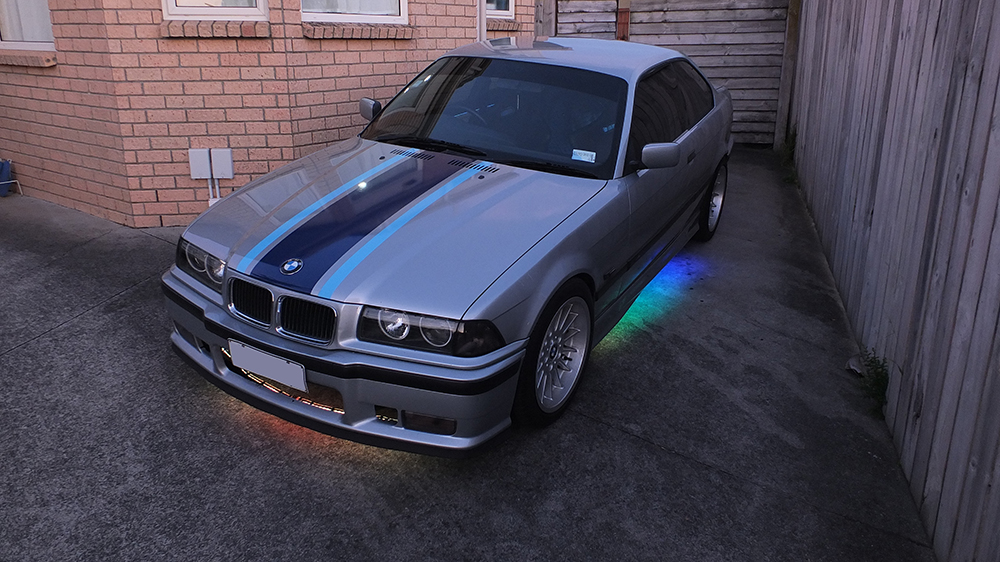
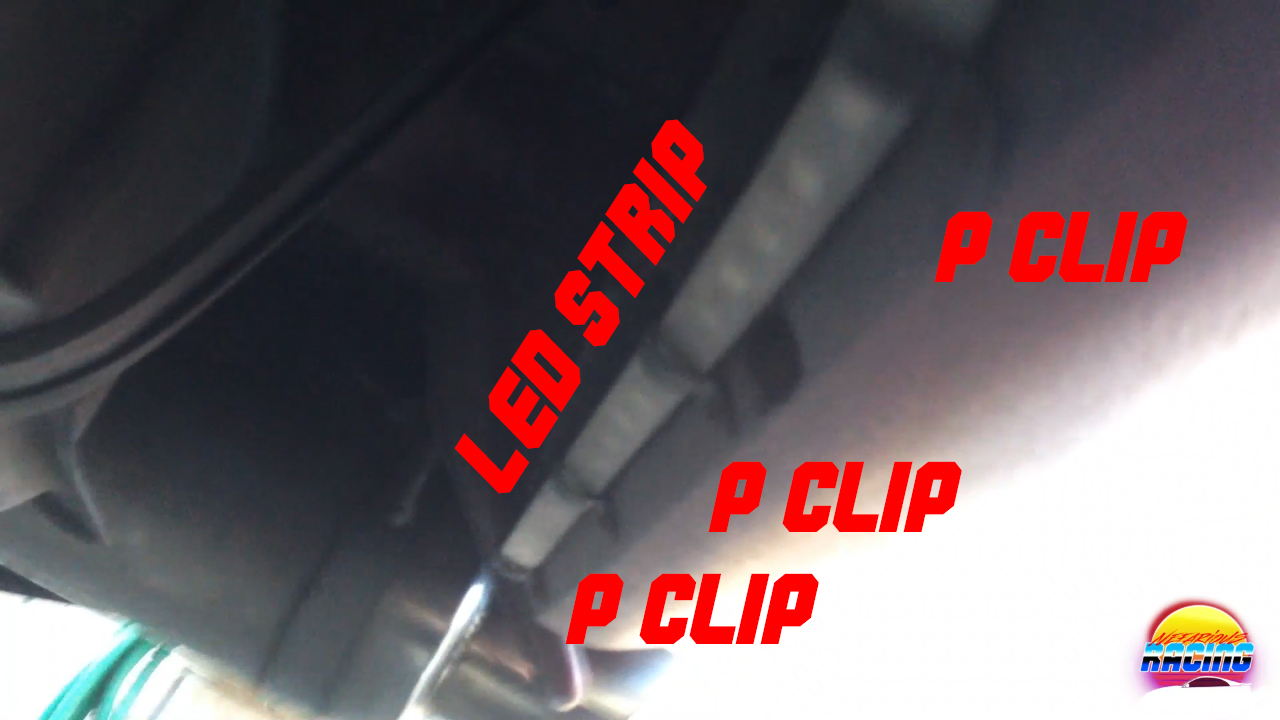
Here’s how I mounted them on the rear bumper of the Nissan 300zx:
Because every car is different, you’ll need to see what you can do with your car.
If you have a lip on your bumper you may also be able to hide the LED strip behind that, which will give you more options and room to work with (literally).
Sides
When mouting the side strips you will need to mount them to the floor of the car, often behind the sills.
Most cars have an edge on the sill, which is perfect to hide the strip behind. However, keep in mind that if you put it too close, the light will get cut off and you will have a sharp cut off on the glow, rather than a smooth fade out. Trust me you’ll be able to see it.
So you might need to do some testing to find the perfect spot. You could also angle the strips inwards a bit so that they naturally fade out before the cut off, so it will be less noticeable and look much better.
You can use the P-clips for these also but it usually means drilling holes in the floor. Personally I’m not a big fan of doing that, so you can either double-side tape the strips on, or you could double side tape the P-clips to the floor and run the strips through them and double-side tape the P-clips shut. I have done that will success as well.
Most LED underglow kits come with double-sided tape on the back of the strips, but personally I like to upgrade to 3M tape just to be sure the strip won’t fall off.
If you are going to double-side tape them to the underside of the car, make sure to thoroughly scrub and clean the underseal, and wipe it down with wax and grease remover. Otherwise you will just be gluing them to dust and dirt, and they will fall off in no time.
Wiring Your Underglow Kit
If you are buying a complete underglow kit, the wiring should be pretty straight forward. Often times you’ll find that you just need to run power and ground, then run the cables for each strip.
If you are running an addressable LED kit, (color chasing), bear in mind that each strip will need to connect to the next, you can’t run individual wires to each one. This is so that it can pass the signal down the line. So you will need to run wiring from the front bumper to the sides, and then from the sides to the rear bumper.
If you are using a RGB or single color kit, you can just run each strip’s cable to each strip individually, no need to connect them to each other. They’ll all connect parallel at the controller.
If you are setting up your own kit, here’s what you’ll need to know:
RGB Kits
RGB LEDs will have 4 wires, one wire for red, green, blue, and one wire for power. All four connect to the controller and the color gets set based on the amperage passed through the red, green and blue wires. So make sure you wire each color correctly using the same wires, or some strips will show a different color.
Addressable (Color Chasing) Kits
Addressable LEDs can have either three or four wires, depending on the strip. They will have power, ground and signal, and the ones with four wires will have a backup signal wire incase an LED goes out or something happens to the first wire.
With these ones you just need to make sure that power and ground are correct, the signal wires can cross (since they both pass the same signal), however it’s good practice to keep it tidy and consistent so you don’t have any issues.
Again, with these LED strips, bear in mind that the end of the first strip will have to connect to the beginning of the second, and the end of the second to the beginning of the third, and so on. This is so the signal can be passed down and the LEDs can display what you set.
If you wire each strip to the beginning of the wire, all of the strips will display the same pattern at once. So if you are trying to display a rainbow for example, each strip will be a rainbow, as opposed to the whole setup making one big rainbow.
General Wiring Tips
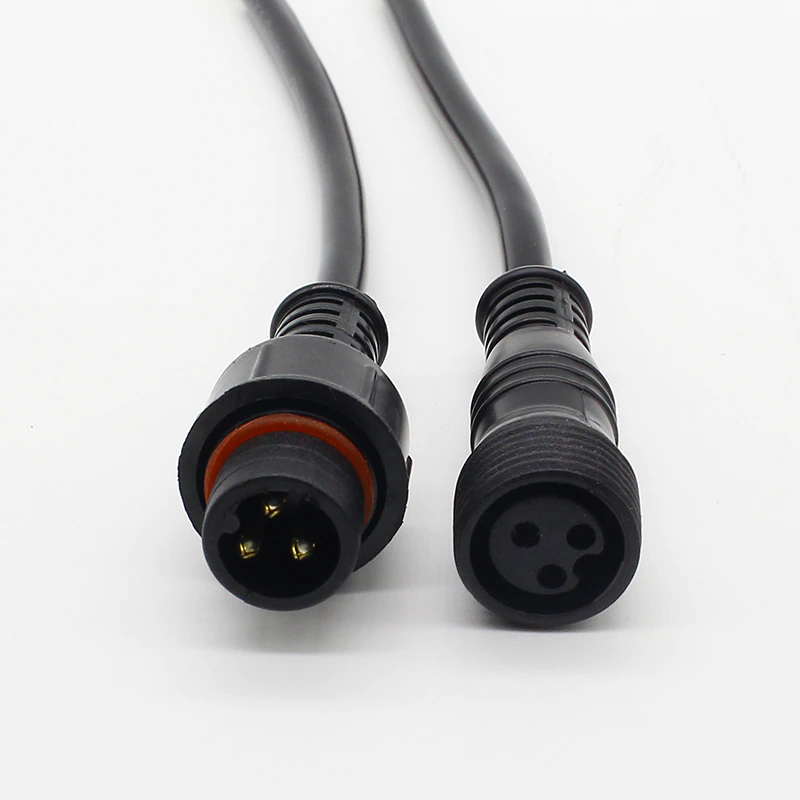
Make sure that you use waterproof connectors for any connection on the outside of the car. Not only will this ensure that you don’t get any short circuits when it’s wet and set your car on fire, but it will stop corrosion on the pins which can cause your LEDs to stop working (and possibly burn your car down).
I personally like these waterproof connectors which you can get from Aliexpress and order with the number of pins your require:
And that’s really it. That should be all the information you need in order to get the exact underglow kit you have been looking for. Keep in mind, if you want it to look good, there’s going to be some customizing involved (isn’t that the point?) but the information in this post should give you more than enough to get started.

Cars owned: Mk2 Golf with 1.8T swap, BMW E28 with M30B35 swap, BMW E36 328I Mtech, BMW 750IL, Nissan 300ZX, Honda Civic EF
- BC Racing BR Series VS Tein Flex Z Coilovers - April 15, 2024
- The Pros and Cons of Shock Body Vs Spring Perch Coilover Height Adjustment - April 13, 2024
- Monotube Vs Twin Tube Shocks: The Ultimate Guide - April 11, 2024